after the storm

after the storm
Welcome autumn!
Showing posts with label photography tips. Show all posts

Tuesday, September 6, 2011

photoshop...

cracker jack texture by Kim Klassen

I have a love/hate relationship with Photoshop. When I first started with digital, I didn't want to alter my photos at all. They were what they were. It took me long enough to even think digital was a good idea so altering my photos was never going to happen. I saw photos that were altered so much, previously lovely children almost had an alien plastic doll look with eyes like no one had ever seen. I knew I wasn't interested in that. I saw photos of middle aged women without any smile lines. I knew I wasn't interested in that. I saw photos that had the look of all my faded photos from the bad film of the 70's. I knew I wasn't interested in that. Then I realized that I could change my photos to black and white. I could make them just the kind of black and white I loved - dark blacks, white whites and lots of contrast. Then I realized that I could tone them a bit to look like different eras of black and white film. All of a sudden, I was cropping, sharpening and even popping the color once in a while. I still didn't know much about Photoshop but I could do a few things.

Adding textures to photos has intrigued me for a long time but I really didn't know how to do that. Friends led me to Kim Klassen, queen of the textures and extremely generous with her creations. All of a sudden, I actually liked playing with Photoshop. It was fun to take a photo and then alter it with Kim's textures. It became art for someone like me who can't draw or paint.

These days, I do love Photoshop. I still rather spend my time behind the camera instead of in front of the computer but I do have fun. And I have to admit, once in a while, I change a photo to look just like those faded pictures from the 70's.

Saturday, July 2, 2011

getting ready for the big day...


The 4th is quickly approaching. Here are some tips for getting great photos of the celebration. Unfortunately, Arizona has been besieged with wildfires. To avoid any more, fireworks have been banned in most of the state. I won't be out shooting fireworks this year but I would love to see what you capture! Leave me a link.

Shooting Fireworks by Barbara Carroll

1. Bring a small flashlight with you. This will allow you to check your camera settings in the dark. I have a small one with a ring on it that I keep attached to my camera bag. It comes in handy.
2. Turn off your flash. It will be useless in this situation. If you are unsure about turning off your flash, check your manual.
3. Use a tripod. If you don’t have one, use the top of your car, a tree stump, anything that won’t move and will keep your camera safe. Be careful of crowds. I have used the top of my car and some crumpled up t-shirts to get my camera in just the right position. Handholding in this instance will give you a lot of blurry photos. If you have a cable release, a remote or a self timer, use it. This will help to eliminate camera shake.


4. Be aware of your background. This, of course, is according to your taste. I like to have only the sky. I have seen some remarkable photographs taken in city settings with beautiful buildings included in the photograph. Certainly fireworks pictures taken at Disneyland wouldn’t be complete without Cinderella’s castle. Cars, fences, trees, telephone poles etc. can detract from the photograph. A simple background is usually the best. Try to be in a dark area, free of street or car lights.
5. Set your ISO to 100 or 200. Although it seems natural to set it as high as it will go, you will be more successful using a low ISO and keeping your shutter open for a longer period of time. Graininess in photos can look really cool but in photos of fireworks, it is a distraction and hard to remove effectively. If you are unsure about changing your ISO, check your manual.
6. Anticipate the action. You can usually hear the launch and then click the shutter when you expect the burst.
7. Try these settings:
a. ISO 100, shutter speed 1 second, aperture f/8 or f/11 or f/16, set your focus at infinity. Most cameras will have to hunt to focus in the dark, so put your lens on manual focus (there should be a switch on the lens). Vary your shutter speeds from 1 – 5 seconds.
b. Use the same settings and if you have a B (bulb) setting on your camera, set it on B. Then you can keep your shutter open for as long as you like. Keep your finger on the shutter (or use a cable release) during a burst. It is fun to keep it open for 5 seconds to get lots of fireworks.
c. Bracket your exposures. This means trying different settings to see which works the best. Look up bracketing in your manual for a quick explanation. I would suggest only varying the shutter speed.


8. Choose your lens. If you are close to the action, choose your wide angle lens. If you are further away, use your telephoto lens. Try vertical and horizontal shots.
9. Take advantage of your digital camera. Take plenty of pictures. Every one won’t be a keeper in these changing circumstances. Try a variety of settings and continue to check your pictures to see if you are getting what you want.
10. Be safe! Fireworks can cause injury so make sure you don’t get so wrapped up in your photography that you forget about safety!


I am so happy to be back. Thanks for all your good wishes!

Saturday, March 19, 2011

shooting the moon...

Tonight is a supermoon. If you want to try to capture it with your camera, here is a reprint of an article that I wrote for the Mortal Muses.

Ah, the moon. Mankind has been endlessly fascinated with it. Photographers always want to capture it. It can be a frustrating process. What we see, often isn’t what we capture. Normal rules of getting a good exposure just don’t apply. It can be difficult to get an accurate meter reading when you are metering on a very bright object in a very dark sky. I finally gave up metering and just started experimenting. Your equipment, your location, your sky conditions will all play into getting a good shot.

Here are a few tips to help make that process a little easier:

1. Make sure your flash is off. If you don’t know how to turn it off, check your manual.

2. Use a tripod. Your exposures are apt to be long ones and you won’t be able to handhold your camera without some camera shake. If you don’t have a tripod, use any flat, steady surface, like the top of your car or the top of a wall. Don’t forget that long exposures can drain batteries more quickly so make sure your battery is fully charged or you have a back up.

3. If you have a filter on your lens, take it off. A filter may cause a ghosting effect.

4. Use the longest focal length you have. In most cases, the bigger you can make the moon look, the better. These shots were taken with focal lengths of 150mm (shots that included more scenery) to 400mm.

5. If you are comfortable shooting in manual, do so. The higher the f/stop, the sharper your photo will be.

6. Use manual focus, if needed (there is a switch on the side of your lens to turn the auto focus off). Some lenses really have to hunt in low light and may not be able grab a good focus. Since the moon is so far away, you will be able to set your lens on infinity and get a sharp focus.

7. Bracket your exposures. It is possible to over or underexpose by more than two stops by shooting manually. I recommend starting with your meter reading and underexposing from there. I usually shoot at -1/2 stop intervals to ensure that I get exactly what I want.

8. Use the lowest ISO possible, especially if your camera has noise issues.

Remember that it doesn’t have to be in the middle of the night when you shoot the moon. It is often up early in the morning or before it is quite dark. During the blue hour (more info here), the moon can look quite dramatic.

You can see the drama of the blue sky but the moon has little detail and looks small in the sky. Many (probably most) of the photos you see in magazines that have the huge moon in a cityscape are actually two photos put together either as a double exposure (using film) or in Photoshop (using digital). It is very difficult (and often impossible) to get a crisp edge and proper exposure on the moon while getting the proper exposure on a building. For me, I don’t like putting together photos like this. I’d rather get what I get. To show you a hastily put together example, here is the moon from my first photo with the picture above.

This shot was exposed for the scenery. It was taken near dusk. The moon is sharp but over exposed. A graduated neutral density filter (and lots of practice) can help with this problem. For more information go here.

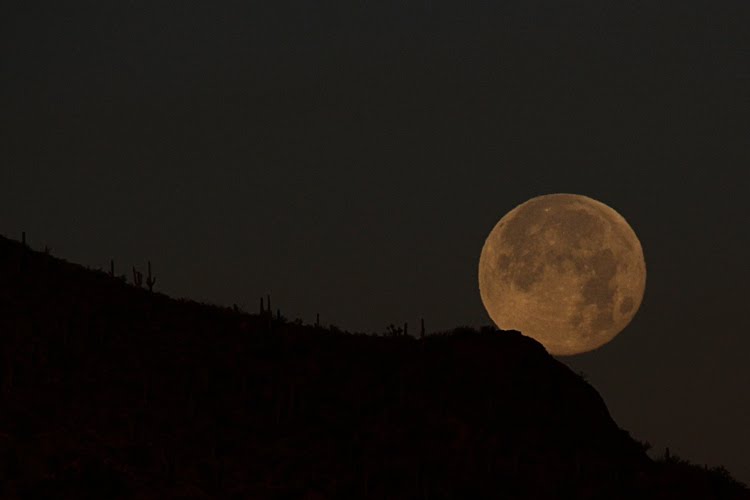
This was taken right before sunrise in January. The moon is in the western sky and the light just starting behind me in the east. The mountains and cactus are in silhouette. If I had exposed for the scenery, the moon would have been overexposed with no detail.

This was the view a bit later with a wider look, exposing more for the scenery than the moon.

This image was taken at night. The variety of the colors lit by the moon in the clouds drew my eye.

This shot was taken with the moon purposely over in the corner like this so I would have room for text. I have used this image for cards, changing the text to fit the recipient.


For more information of moonrise and set times, these sites are helpful:
http://www.usno.navy.mil/USNO/astronomical-applications/data-services/rs-one-year-us
http://stardate.org/nightsky/moon

Remember the key to shooting the moon is experimentation. Bracketing is key. Try different exposures. Most importantly, have fun!

Friday, March 18, 2011

it's all about the light...

Some of you have been asking me about my lighting technique to get black background photos. Since it seems impossible for me to answer your questions without photos, I thought I would write about it here.

If I am photographing one object, I often do it on my dining room table, in the morning. I have a big glass door in there so the light just pours in. It is east facing, so in the mornings, there is strong light (eastern and northern light are the best for photography - not as overly strong as west and south can be). My dining room furniture is rather dark.
You can see in this picture that I have exposed for the whole room. Because the lighting is so streaky, anything in the room that is in that strong light is over-exposed. The exposure is made for the darker parts of the room. If I wanted to get a properly exposed photo of my overall dining room, I would not take it this time of the day. Notice the bowl on the table. You can see that it is overexposed in that light (click on the photo to make it larger). If you look at the rim and what you can see of the part of the bowl that is in the light, it looks almost white with this exposure. I can use this light to my advantage to photograph single objects like this.
When I want to get a photo like this, I get in close and expose for the object. This works in the opposite way of the first photo. By exposing for the bowl instead of the dark objects, the bowl is properly exposed and everything else is underexposed. Everything that is underexposed goes black. I use a wide aperture. In this case, f/2.8.

Now I know you may not have a set up just like this but I bet you will be able to find one. Look at the light that comes through the windows in your home. Our eyes don't really see things like this but our cameras do. Look at different times of the day. It will change during the day and also as the seasons change. My "dining room studio" works best during the spring and fall.

Hope this helps and you can find your spot! I'd be happy to answer any questions you may have.

Monday, December 6, 2010

phototgraphy fun with holiday lights...


Don’t you love the lights of the holidays? They give a lovely glow and set the mood for the festivities. I am pretty much a white lights kind of girl. I don’t especially like them to flicker or race. I just like the quiet, peaceful look. That is not to say that I don’t appreciate seeing all other kinds at other people’s houses, because I do. We have what our kids call “old school” lights across our roof – the big bulbed multi-colored lights. I would rather have a peaceful white there too but I bow to tradition.

Starry lights
It is possible to get a star effect on holiday lights without using a filter. Set a very small aperture (higher number, I know, I know, SO confusing!). For these photos, I used an aperture of f/22. Because you are using such a narrow aperture, you will need to have a long shutter speed which will mean a long exposure. Your pictures will be blurred if you handhold these shots, so use a tripod or some other steady surface. A table, a chair, a stack of books, a step stool, anything that is flat and steady will do. Obviously, tripods are easier because of the mobility but don’t let the lack of a tripod stop you. Set your camera to aperture priority and set the number to f/22. The camera will figure out how fast to make the shutter speed. Be sure not to use a flash. That will spoil the whole effect. Bracket your exposures, trying different settings. You may have click to make these photos larger to see the star effect.

Even the traffic lights are a lovely Christmas red and green.

Look at the star effect on the lights on top of the armoire. These are just ordinary small white lights.


Crazy lights
The holidays give us lights that we don’t normally have available the rest of the year. It gives us a lot of opportunity to play.
This first image is a shot of the tree in front of our downtown library, taken in a standard way.


This image uses the zoom technique. For this shot, I had my camera on a tripod and zoomed in and out with my lens while the shutter remained open, again for four seconds. To get your shutter speed slow enough, set a small aperture (remember, larger numbers) and keep a low ISO number (which will also help prevent a lot of grain). I was using a 24-78 zoom on this but any zoom lens would work.


This is a shot of a front entry. The zoom light effect is from color lights across the roof line and little white lights around the arch and on a small tree.

For this one I twirled the camera while my shutter remained open for 4 seconds. You can see the streaks from the big bulb kind of lights and the smaller white ones.


Hope you have a chance to play around with holiday lights. You'll never know what you will get.

Saturday, November 20, 2010

shoot the moon...


There is a full moon tonight. Did you know it is a "blue moon"? There are actually two definitions of a blue moon. The more modern definition is the second full moon that occurs during a month. The Farmers' Almanac definition is an extra full moon that occurs during a season. One season normally has three full moons. If a season has four, the third full moon of that season is considered a blue moon. For 2010, the time between the autumn equinox and the winter solstice, will have four full moons. Tonight's is the third so it is called a blue moon.

If you are interested in learning more about photographing the moon, I was a guest writer with the Mortal Muses. You can find my article here.

Even if you don't plan to photograph the moon, take a step outside tonight to enjoy the view. It never gets old.

Saturday, July 24, 2010

some more hummingbirds and photo tips too...


Photographing hummingbirds can be so frustrating and so much fun. I am lucky that hummingbirds spend a lot of time around our home. I don’t have any hummingbird feeders but we have planted plants that we know they enjoy. In our yard, they are especially attracted to the pink and red salvia.
Bonnie asked specific questions that I will answer here. I use a 100-400mm lens at 400. For most of my hummingbird shots, I have used a Canon EOS-1 Mark III. The tree that the nest is in is a palo verde tree. The nest was about 3-4 feet off the ground. It was very well protected. There are vines behind it and a larger tree that hangs over the palo verde. It was spring and my husband was going to trim the tree when he saw the nest. We would have never spotted it otherwise. I took a few pictures and then let them be. In the photo of the nest, it is the two babies that you are seeing. I don’t know if they were male or female. To give you some perspective of size, here is a picture (and not a very good one at that) that has my husband’s hand. If you look closely, you can see the two little beaks pointing up.
I have found hummingbirds to be much less skittish than other birds. They may initially fly away from me when I first come out but they are usually back quickly. I sit in a chair and try to keep still. The key is patience. They get familiar with me as I sit out there. Once in a while, they are even too close to me for me to be able to focus. I keep my camera ready to go in my hands. Some days, I get nothing. Other days, I get a lot. Thank goodness for digital because otherwise I would be wasting a lot of film.
This photo was taken on a cold day and you can see how the bird is all puffed out to keep warm.
For most of my photography, I shoot manually but with hummingbirds, I often use aperture priority. If you are not a photographer with a lot of experience, I would definitely recommend the sports mode option on your camera. It will give you a center focus spot and the camera will track the movement of the bird as you move your camera around. It will allow you to take photos quickly. Your camera may have a continuous focusing mode, a burst mode, etc. Read your manual to figure out what may work best for you.
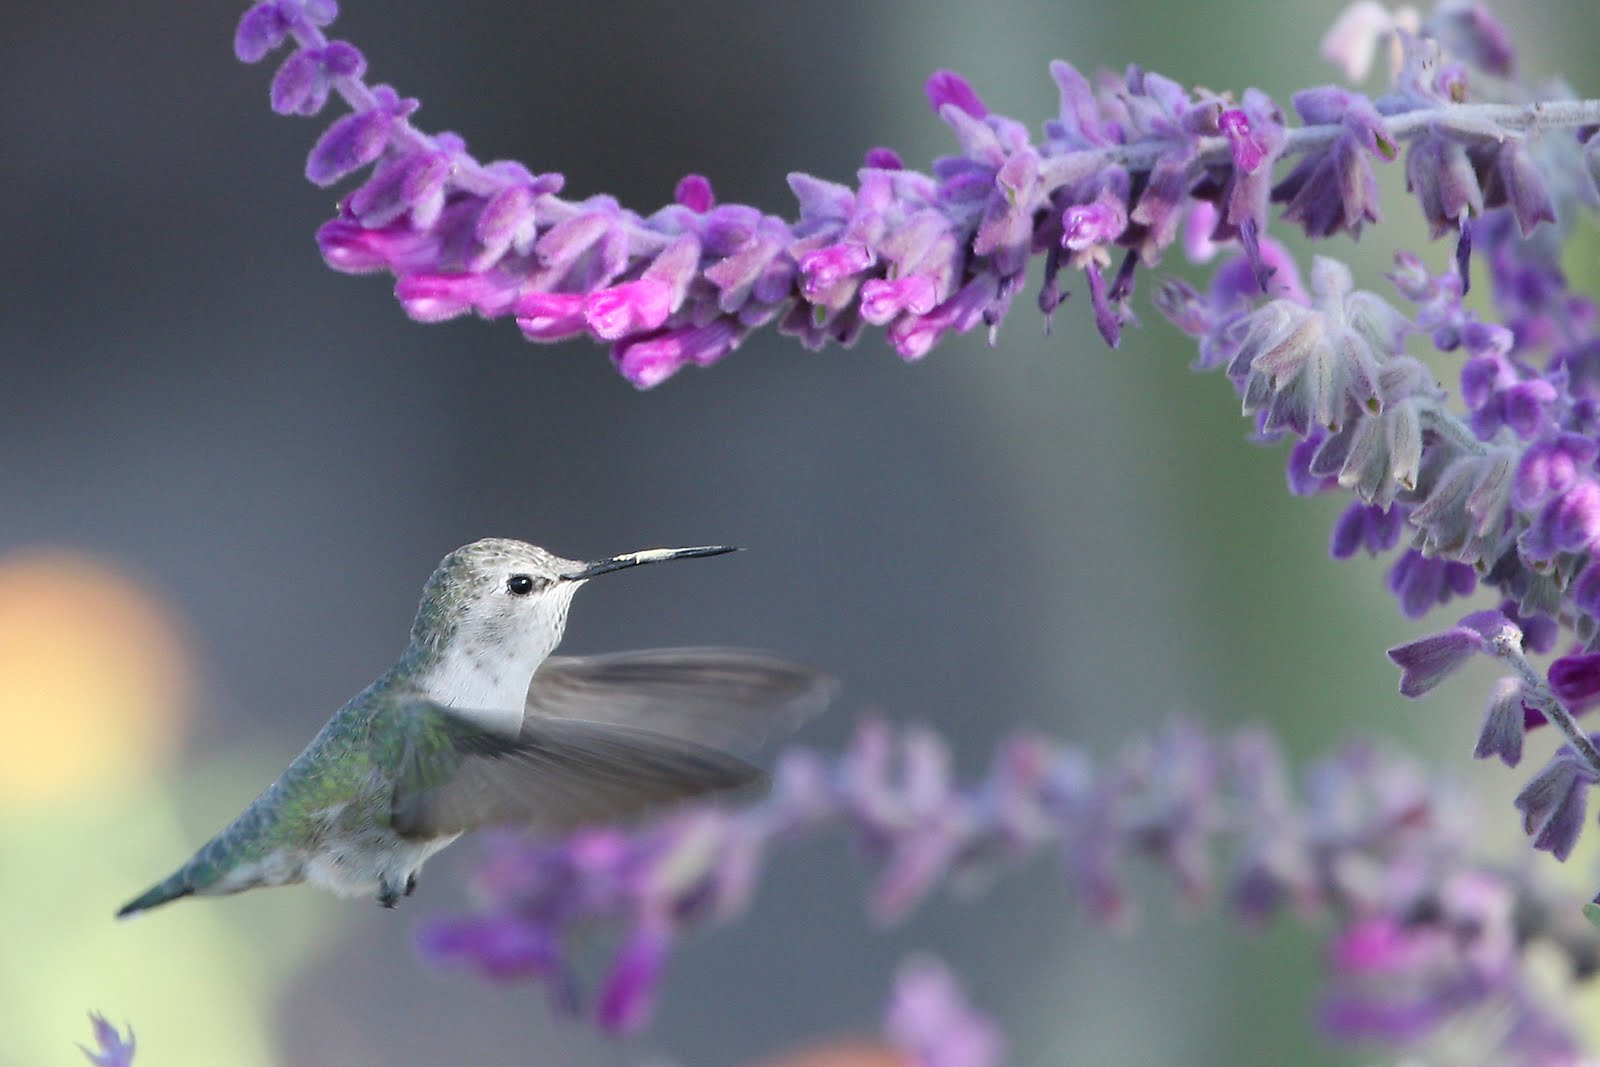
I am lucky to have a camera that can take up to 10 shots per second. It gives me lots of options but, I admit, there are times that I am shooting so fast that I am getting nothing but the flower because the hummingbird has already moved on. Hummingbirds are fast! They not only move quickly but they beat their wings very quickly too. I have found that even shooting at 1/2000 of a second, I may not stop the movement of the wings. Because of that, shooting on sunny days will work much better than on cloudy days. Try to position yourself with your back to the sun. It will make the light on the bird stronger and you might be able to get a catchlight too. Catchlights are those tiny little reflections of light that show up in photographs that make the eyes stand out more. (They are good to have in photographing people too.) You can see catchlights in my photographs here. Click on any photos to see it bigger. Contrary to popular belief, hummingbirds do rest. I have captured many photos of them resting on a branch. With patience, you may find them posing for you.
I hope this helps. There are nature photographers who have very elaborate flash systems to capture hummingbirds. I like using available light. Please let me know if you have any other questions. As you can see, I love photographing hummingbirds.